How to refurbish and restore a sash window the professional way
Firstly the best way of preparing your sash window is to take the window out completely and burn all the paint off. This will make insure that you are starting with a fresh canvas. You will discover years of layers paint that will stop full movement on the sashes. When you do this do wear a proper industrial breathing mask. A 28 Day Half mask from Screwfix is one of the better ones. It will insure that you have some protection against any lead paint that’s been used in the past.
Removing the windows, we need to take off the staff beads & parting beads. Carefully scoring the staff beads and parting beads where the timbers meet the sash box frame. The quickest ways is using a multi tool to get a perfect edge in-between the staff and the window frame. Thus ensuring that you don’t pull of any paint work on the inside of the reveals and the box frames. Only take off the Staff bead in the first.
Removing the sash windows
Next we would take off the sash cord and remove the window. This should have been nailed on with 20- 25mm galvanised clout nails. Some people may have used screws to fix the sash cord which should never happen. Reasons being, screws rust and cause rot and the heads shears off with constant movement.
To take off the nails it’s always best to nail the sash cord quite high where the staff bead has been before on the window frame. This ensures that you don’t lose the weights down the pocket. They are quite heavy and can easily bed themselves into brick dust that has settled at the bottom of the pocket. The debris that has gathered at the bottom will be very fine and will embed the weights easily. Be careful to see if the other weight has dropped to the bottom then you will get them both stuck between themselves. There is only 5-10mm gap between the weights and the pocket so caution is needed.
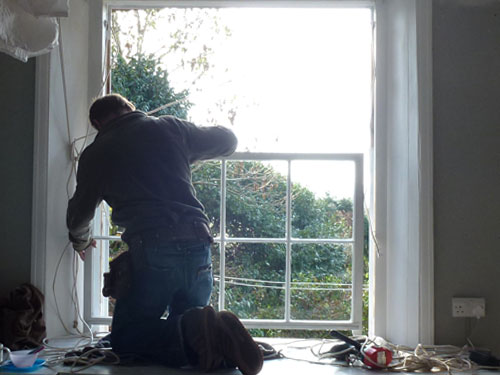
Having the right tools is a must when refurbishing sash windows
So pull the bottom sash towards you so it is leaning at about a 70 degree angle. Then get an old chisel, screwdriver or nail pincers with a claw. This will get behind the nails and start to release the sash cord easily. Do make sure that you keep tension on the sash cord to help with the removal of the nails a lot easier. Next lift the sash window out and place it to the side out of the way. Be careful of the wind at this point cause it could smash the glass if it fell.
Next you can remove the parting bead with the same procedure as above. Please remember to score the parting bead in-between the window and the parting bead. Get a chisel just behind the parting bead, were the meeting rail is to start levering off the bead. and slowly ease it out of its rebate. Do note when using the chisel use the flat side towards the parting bead. It may cause a little bit of damage but it is hidden behind the meeting rail.
Then we would start on the top sash. Same process on the bottom sash window but the window might not come all the way down to the bottom of the sill. In which case another pair of hands is good to make sure that no accidents happen. Also if the window has been painted shut you will need to release the paint from the window by scoring down the stiles of the window. This is very dangerous and really should be attempted by a professional with insurance.
Removing the top sash can be dangerous so please be careful.
You have to be very careful at this point and make sure that the sash cord is still on the window. The reason being that when you release the window, it could then drop to the bottom of the sill and this could potentially smash the old glass owing to flaws present in the glass from when it was made.
Please be very careful if you are working at heights. It’s dangerous to you and others below. You should have insurance when doing so, especially with glass. If you get someone to do this procedure please make sure they have insurance for handling glass. Please make sure that the area is safe for others to be near and follow HSE guidelines at all times.
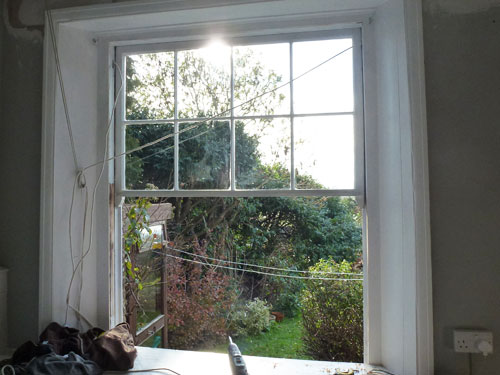
Preparation is everything on sash windows.
When we refurbish your sash window we take all the old paint of using Rothenberger brazing torches. These are very quick and can scorch the timber or crack the glass if not used properly. We do this because when you have flaky or peeling paint, it is no good to just sand back and paint on top.
Because the paint is coming away from the windows, it won’t take long for the existing paint to do the same thing leaving you with a really bad paint job. This will not last long before it starts to blister again leaving you out of pocket and asking the painter back again to do the same thing.
Firstly we start the preparation on the window frames and then the windows. We do it this way round because we always have the windows back in every night. Even when we are making new parts for the windows due to rot. We always have to plan for the weather, even though we have a workshop to take the windows too. It is always better at the property and this makes it a faster and easier job. Making a much a happier customer
Hiring a professional has its benefits and we follow strict procedures
- Be aware when we do use burners we will stop for 1 hour before we are leaving your property.
- We have fire extinguishers and water next to staff doing the burning off and make preparations when hot works are being done
- All our dust sheets are fire retardant and treated with Proban.
- Our public liability cover is £5 million and we are covered for hot works
We pay great attention to the mouldings when we are doing the preparation, getting them back to where you can see every line that was originally in the sash windows. These are usually Ogee or Lambs Tongue. Originally joiners would have made their own mouldings. This makes it very hard to replicate some of the original mouldings and this is where we will hand carve certain mouldings ourselves. Other companies will not do this due to the time factor, lack of patience and skill.
Painting your sash windows
Paints have come along a great deal from yesteryear, when we paint our windows we use acrylic and water-based paints which are more environmentally sound. These products can also cut time down by half. The other option is to use oil based paints which will increase the job slightly due to drying time. The water based paints are Dulux trade paints with 2 Acrylic Primer Undercoats and 2 topcoats of the required finish. The oil based is Sandtex undercoat primer and Sandtex gloss This is always fine filled and sanded between coats giving you that wow factor.
Next step is to router the windows this is done on the mid-rail in the centre of the bottom sash window. The top of the sash window would be on the face edge of the top- rail 5mm from top edge. Some companies do this at the top edge of the sash window but we have found this doesn’t work due as the draught pile is not that flexible. This will push the window down slightly and cause the window to not meet properly on the meeting rail. This effects the mid-rail draught pile and sash locks. if your window is not square at the top of the frame it will not seal properly and render the whole thing useless.
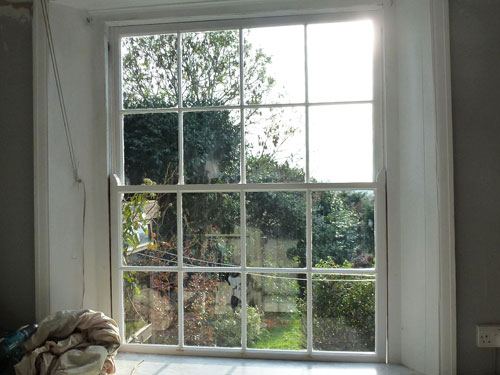
Hanging the sash windows
We always get both sashes working properly When it comes to hanging the windows. The top sash should always be able to drop all the way down to the window sill to make cleaning easier for the customer. If it doesn’t the weights hit the sash pulleys and eventually brake them. A lot of the time sash windows will have been painted shut at the top this is due to painters not being able to paint them properly or being too lazy.


The sashes are made double hung to let the warm air escape from the room. this giving you ample ventilation without the wind blowing in. what happens is warm air rises and if the air has nowhere to escape. Just open the bottom sash slightly and open the top sash as well thus creating somewhere for the hot air to go. This will cool the room down very quickly and create a nice living area. If the window is single hung then it is quite easy for us to make them both work. and with our Antique Architectural window furniture shop we can install original brass pulleys for you. This would make the windows look like it was originally constructed like this, keeping with the age of the property.
Once the windows are hung and the staff beads have been placed. We would caulk, fill and fine sand between coats on all the internal broad-work of the windows and frames. Then we would touch up anything that needs to be done on the outside with one last topcoat.
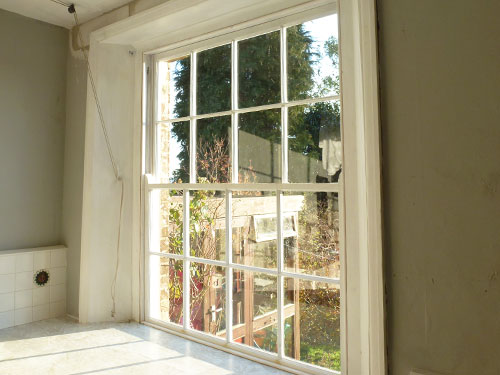
Original sash window furniture @ antiquesashwindowfurniture.co.uk
Last but not least, we install all the window furniture. A great way to set the off the original features of your home sympathetically to the age of your property is to use original fixtures. This is why Sussex Sash Window Restoration Ltd has got its own architectural antique window furniture shop. Dedicated to bring the original features back to your windows that has since been broken or gone through the years. We source these constantly from all over Europe. so please take a little time to see what our company can do for you, that no other company can do.